This tutorial presents how to set up a Quartus compilation flow with UTM on Apple Silicon Macs.
Introduction
Why would you want to program Intel FPGAs on an Apple Silicon Mac? Maybe you are a student/TA who needs to run school projects on an Intel FPGA, but you only have access to an M-series chip MacBook.
The difficulty of programming Intel FPGAs on M-series Macs mainly comes from the EDA tools. The EDA tools are only designed for Windows/Linux running on x86 architecture. Since Apple switched from Intel x86 to their own ARM-based architecture, it becomes difficult to use virtualization to install Linux/Windows on Macs. However, we can still emulate an x86 operating system on an ARM-base architecture. Intuitively, it uses ARM instructions to mimick the functionality of each x86 instruction, and therefore allows us to run x86 software on an ARM architecture. This comes at a cost, emulation is far slower than virtualization, since the software is not running natively.
Install UTM on MacOS
UTM is a virtualization/emulation engine that runs on Apple Silicon. From their website description:
On Intel Macs, x86/x64 operating system can be virtualized. In addition, lower performance emulation is available to run x86/x64 on Apple Silicon as well as ARM64 on Intel.
🗿 UTM also works on iOS/iPadOS. Theoretically you can also use Intel FPGA with an iPad or an iPhone. But I didn’t try.
The first step is to download and install UTM from their website: https://mac.getutm.app
Install Ubuntu 16.04 LTS (x86 version) on UTM
UTM website provides a gallery of pre-built virtual machines, but there isn’t one I needed. To run Quartus, I need to build a Ubuntu 16.04 x86 version virtual machine.
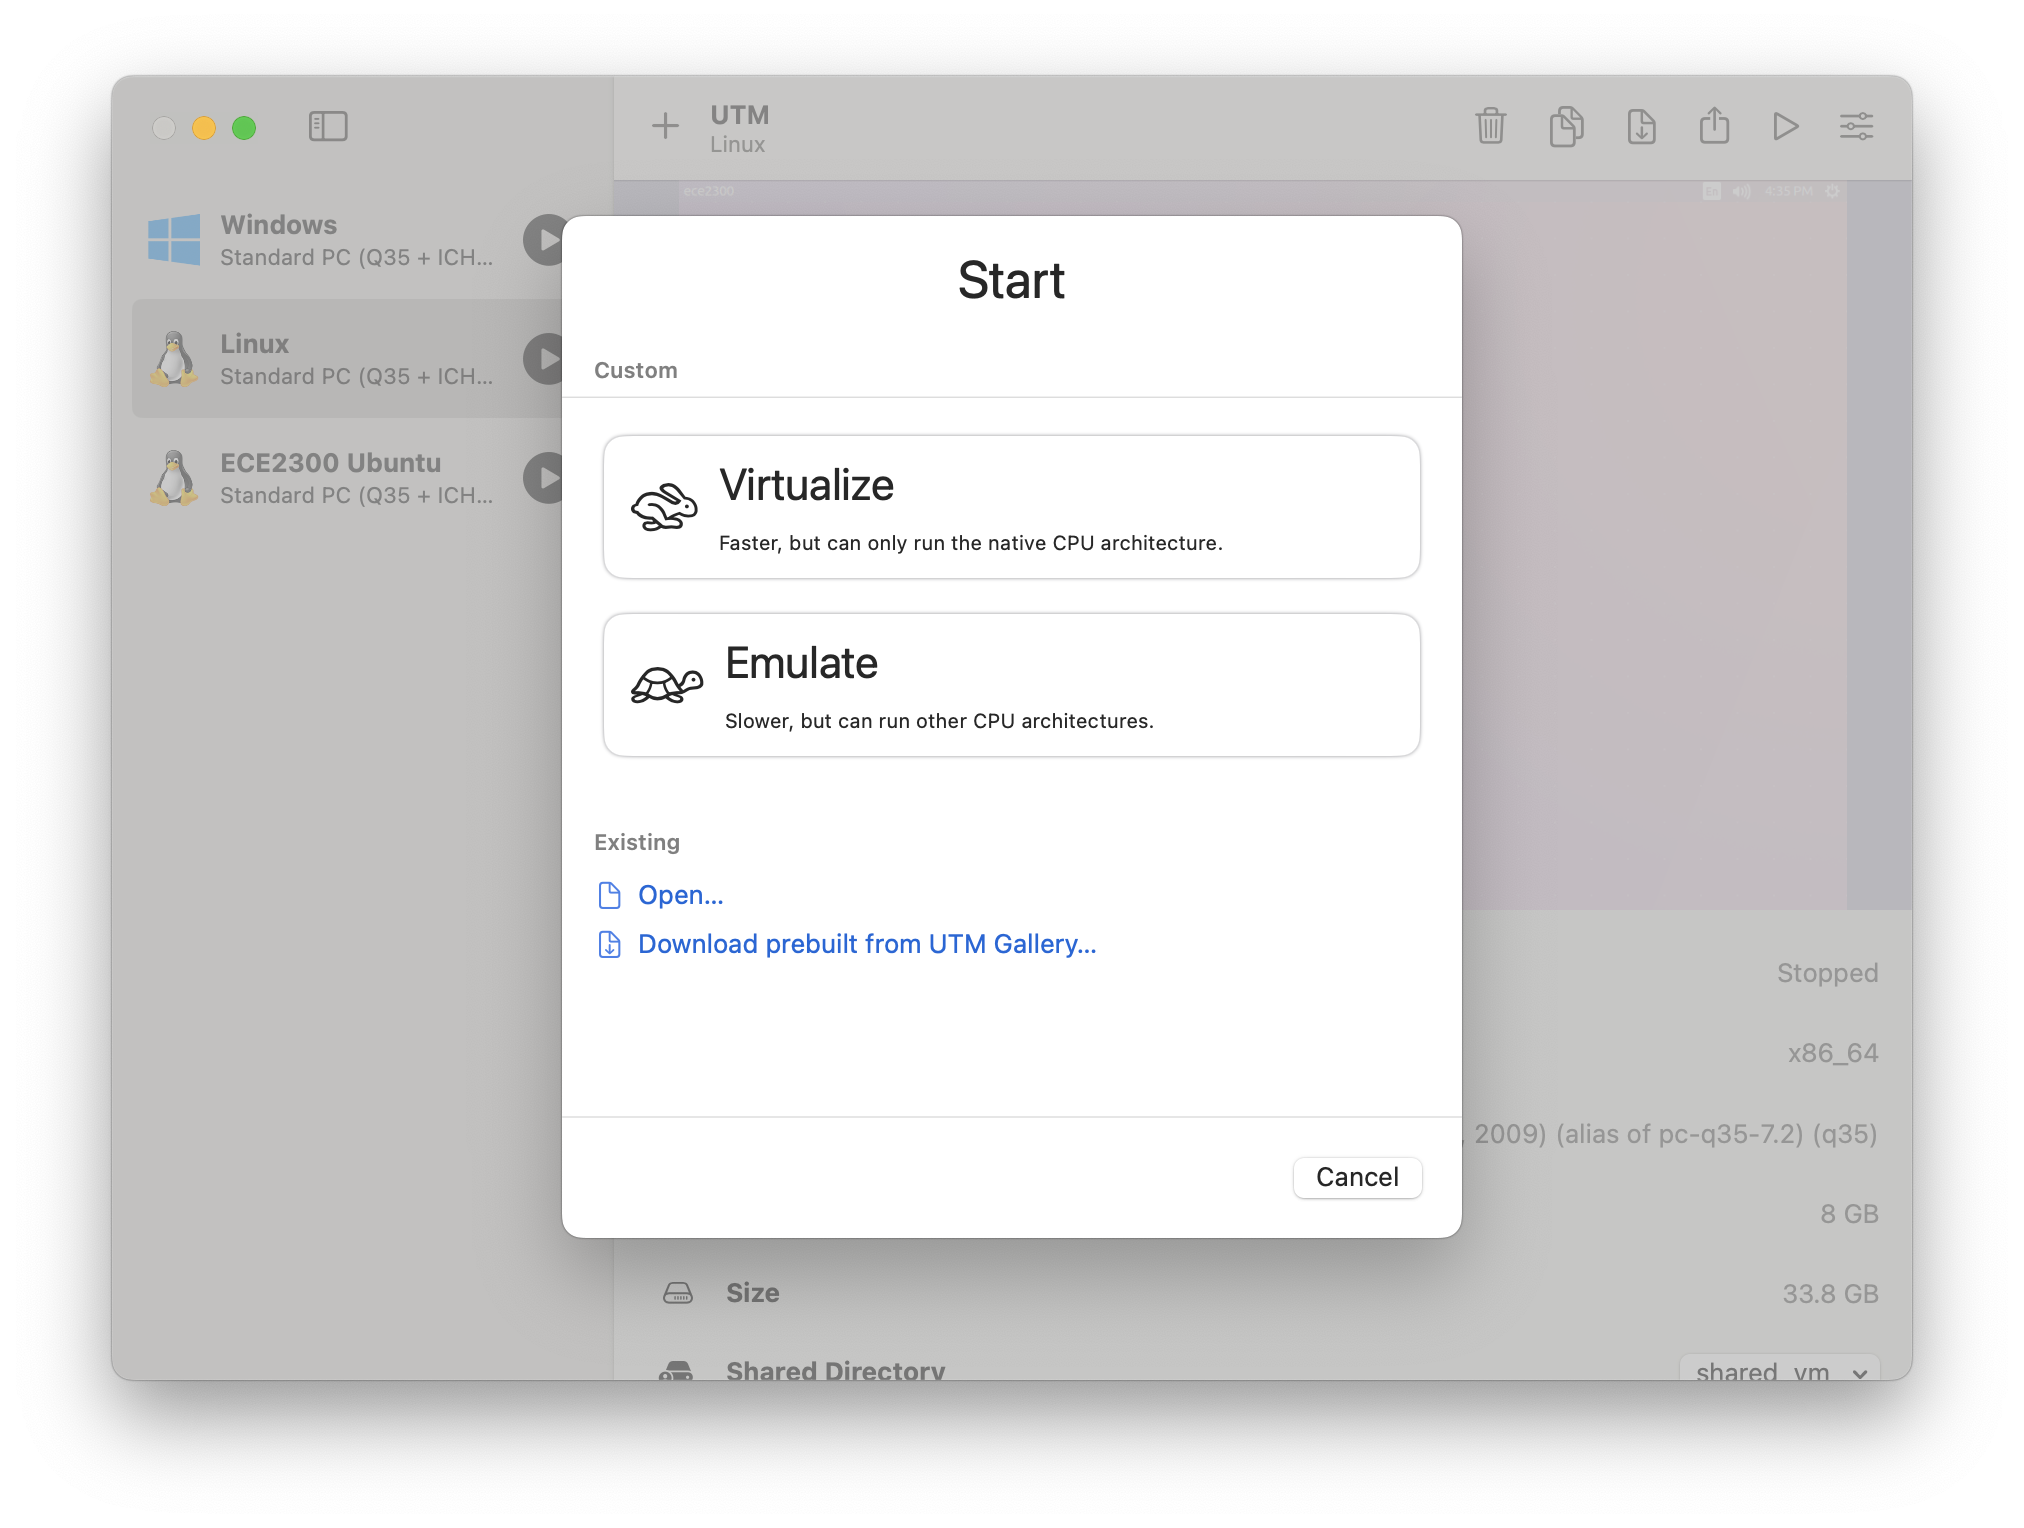
Let’s start a new virtual machine by clicking the + on the left corner. Then, select “Emulate”:
Next, select the iso image downloaded from the Ubuntu release, and begin installation. It is a standard Ubuntu installation process. At the end of installation, you will select ejecting the disk on the upper right corner, then restart the VM, and it should be good to go.
Run ./QuartusSetupWeb-15.0.0.145-linux.run from the directory where you downloaded the files. Make sure ModelSimSetup-15.0.0.145-linux.run is in the same directory.
Select required tools, for me they are:
Quartus II Web Edition (free)
Modelsim-Altera Starter Edition (free)
Devices -> Cyclone V
Click “Next”, let the installation finish, and you should see a icon on the desktop.
There are a few additional steps to make sure everything works.
Open Quartus and go to Tools > Options > General > EDA Tool Options . Copy the path in the “ModelSim-Altera” box — for me this was /home/ubuntu/altera/15.0/modelsim_ase/linuxaloem.
Open a terminal, change directory to this path, and see if ModelSim works.
1 2
cd /home/ubuntu/altera/15.0/modelsim_ase/linuxaloem ./vsim -help
If ModelSim works, it should print something like:
You don’t need to install any drivers to get the USB Blaster working on Linux since Quartus uses a Linux USB library instead of a driver. You do, however, have to do a little tweaking so non-root users can access it [1].
Add a udv rule allowing regular users to access the blaster.
1
2
3
4
echo'# For Altera USB-Blaster permissions. SUBSYSTEM=="usb",\ ENV{DEVTYPE}=="usb_device",\ ATTR{idVendor}=="09fb",\ ATTR{idProduct}=="6001",\ MODE="0666",\ NAME="bus/usb/$env{BUSNUM}/$env{DEVNUM}",\ RUN+="/bin/chmod 0666 %c"' | sudo tee /etc/udev/rules.d/51-usbblaster.rules > /dev/null
Test if JTAG is working
Plug power to the FPGA first.
Connect FPGA to Mac with USB next.
Select USB blaster in UTM, connect FPGA to the virtual machine.
Test if jtagconfig works
1
/home/ubuntu/altera/15.0/quartus/bin/jtagconfig
You should see output like:
1
2
5) USB-Blaster [3-3]
020A60DD 5M570Z/EPM570Z
Troubleshooting
Quartus takes forever to open a project
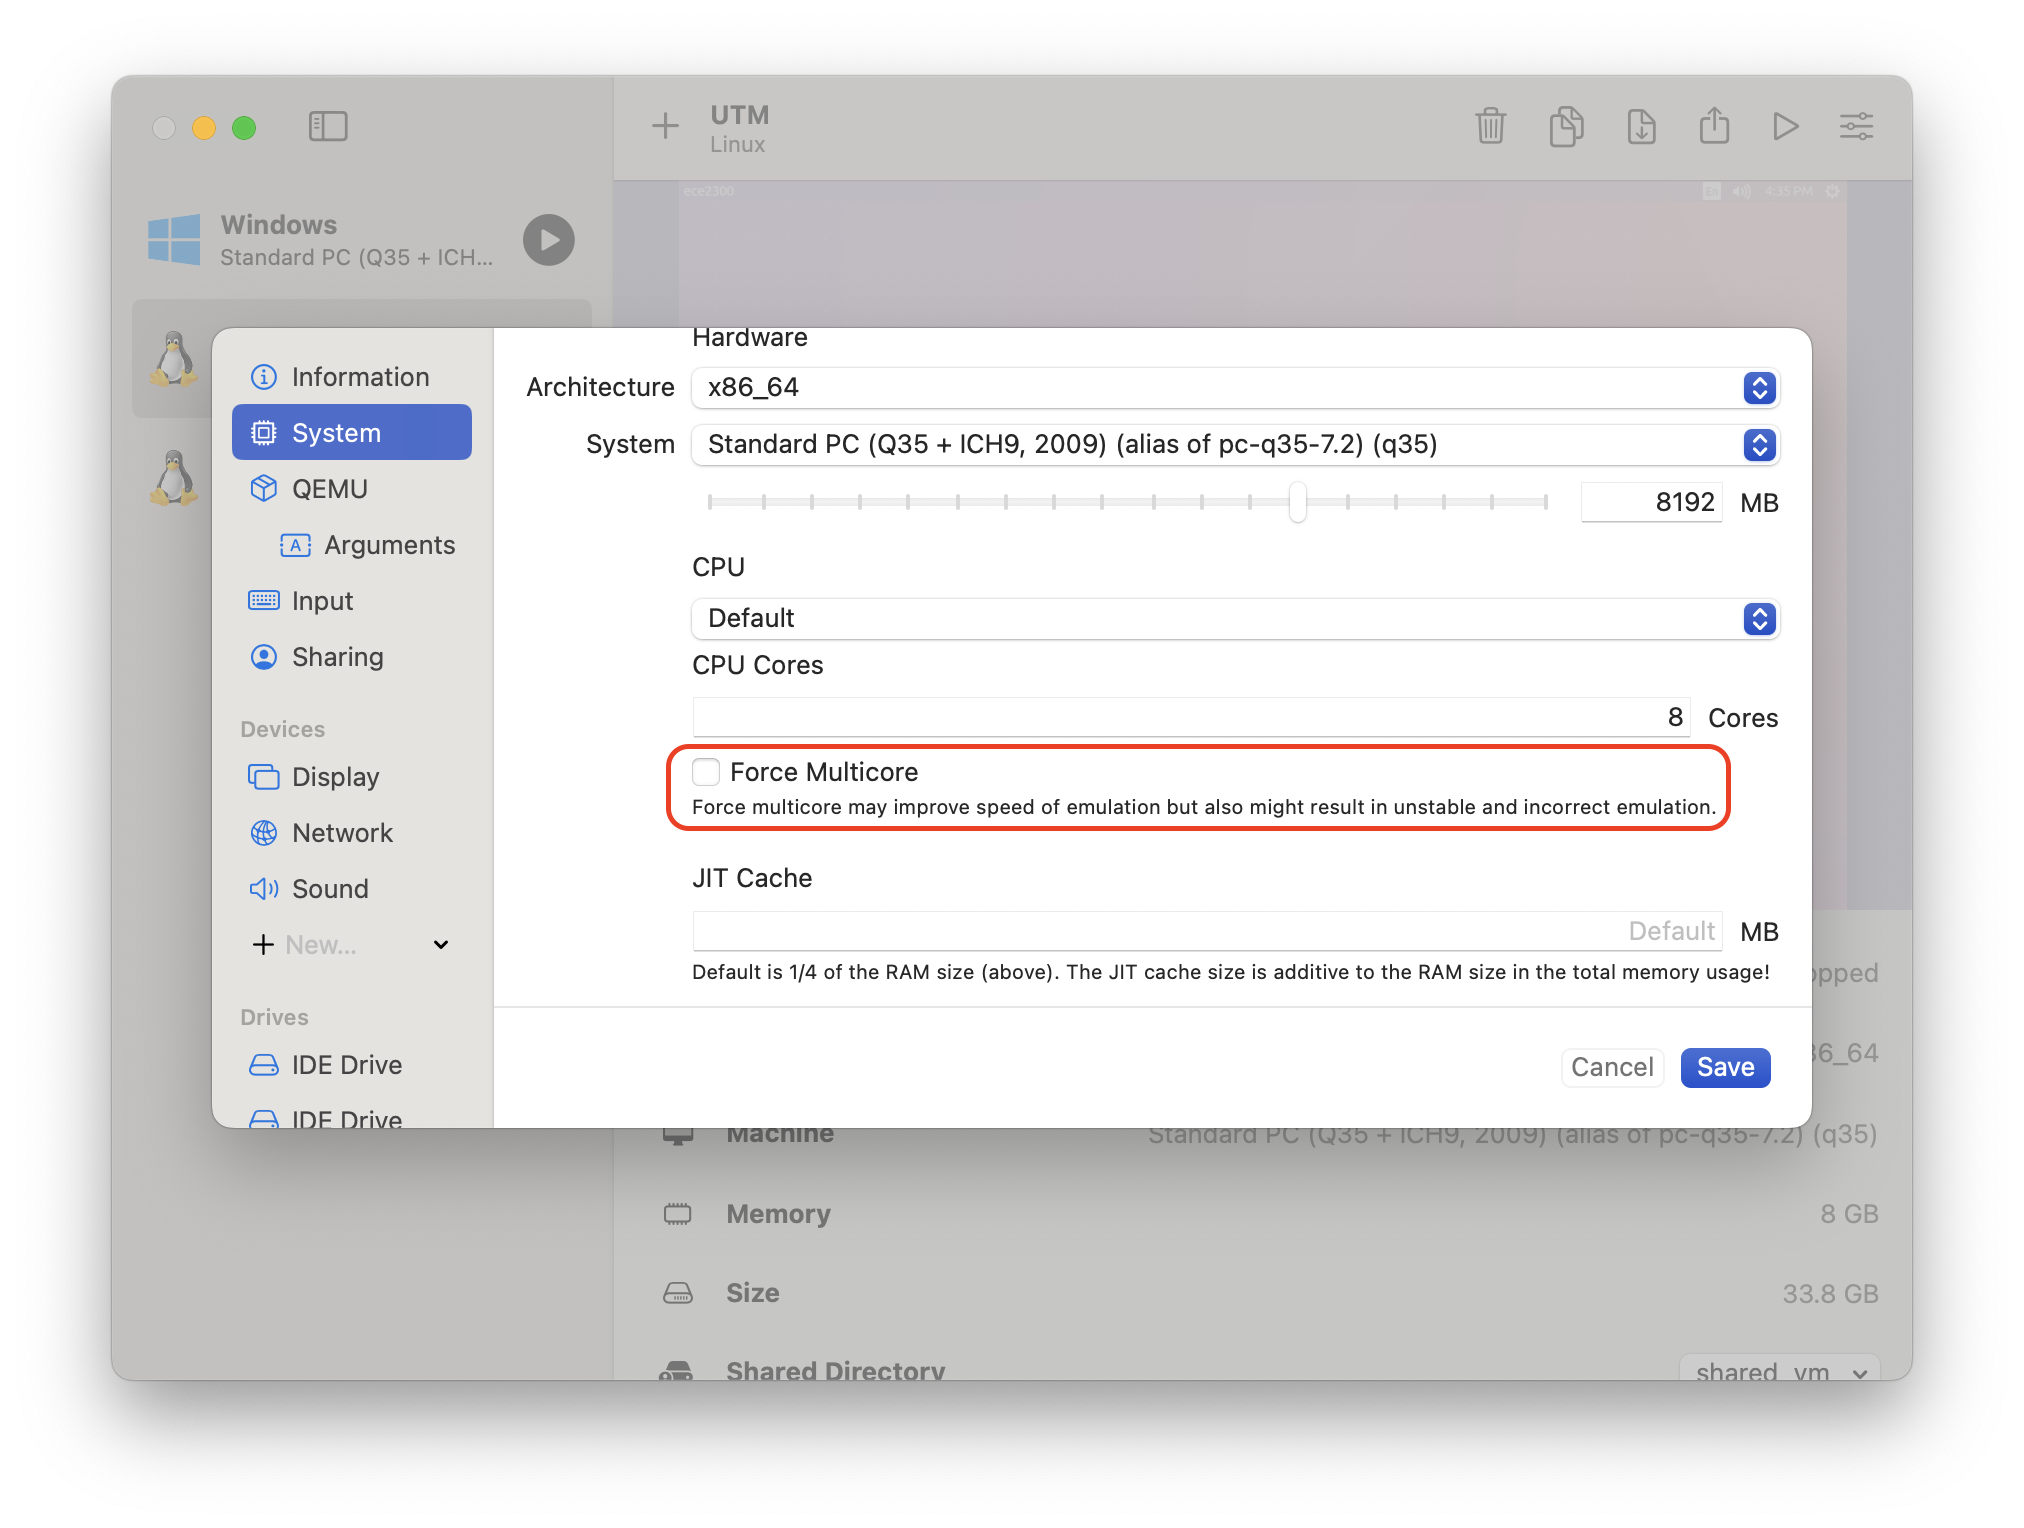
You probably enabled “force multicore” in the VM settings. I turned this on to make it work faster during installation, that did not cause any problem. But when I run Quartus, I have to turn it off, otherwise Quartus gets stuck during opening projects.
JTAG chain broken
I saw this error during testing jtagconfig;
It turns out you need both the power cable and the USB cable connected to the FPGA board. Although USB alone can power the board, the serial port obviously doesn’t work. Solution: